Introduction
For many backyard farmers, few sights are more rewarding than seeing tiny turkey poults breaking free from their shells. Yet hatching turkey eggs can be challenging without the right knowledge and equipment. In this guide, AV Birds shares practical steps, science-based incubation methods, and professional insights so you can achieve higher hatch rates and raise healthier poults.
1. Understanding the Basics of Turkey Egg Incubation
Turkey eggs are larger and denser than chicken eggs, requiring about 27–28 days of incubation. Optimal conditions include:
-
Temperature: 99.5°F (37.5°C)
-
Relative Humidity: 50–55 % for days 1–25, 60–65 % for lockdown
-
Turning: At least 3 times daily until day 25
Fertility rates depend on hen nutrition, tom-to-hen ratio (1:5 recommended), and egg freshness. Older eggs (>10 days old) may lose viability.
(External link reference: University of Kentucky Extension – Turkey Incubation Basics)
2. Choosing and Preparing Fertile Eggs
Select clean, unwashed eggs with uniform size and strong shells. Avoid cracked or misshapen ones. Store at 55°F (13°C) and 75 % humidity for up to 7 days.
Before incubation:
-
Let eggs warm to room temperature.
-
Mark each side (A/B) for tracking turns.
-
Calibrate incubator using a reliable thermometer/hygrometer.
(Internal link: link to your “Turkey Hatching Eggs for Sale” page.)
3. The Incubation Phase (Days 1 – 25)
Maintain steady temperature and humidity. Fluctuations >1°F can reduce hatch rate. Candling on days 7 and 14 reveals development; discard clear or stalled embryos.
Tips:
-
Ensure gentle airflow inside the incubator.
-
Keep water trays clean to avoid bacteria.
-
Use distilled water if possible.
4. Lockdown Phase (Day 25+)
Stop turning the eggs and increase humidity to 60–65 %. Keep air vents fully open for oxygen exchange. You may hear peeping or see pipping (when the beak cracks the shell).
Avoid opening the incubator once hatching begins to prevent humidity drops. Turkey poults often take up to 24 hours from pipping to fully emerge.
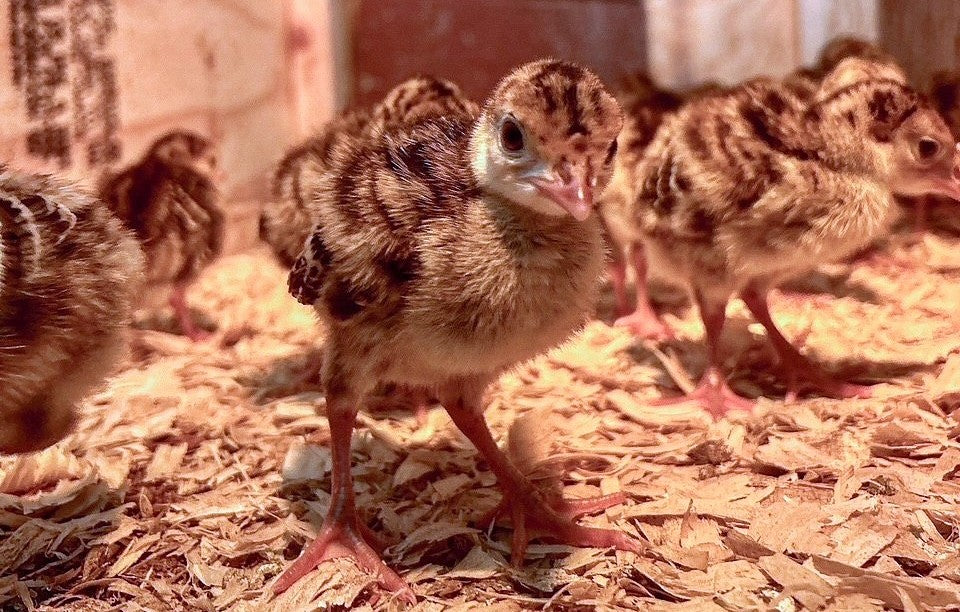
5. Post-Hatch Care & Brooder Setup
After hatch, allow poults to dry and fluff up before moving them to a brooder set at 95°F (35°C). Reduce temperature by 5°F each week until fully feathered.
Essentials:
-
Heat lamp or brooder plate for consistent warmth.
-
Non-slip bedding (pine shavings preferred).
-
Fresh water with electrolytes.
-
High-protein starter feed (28 %).
(External link: Cornell Poultry Extension – Brooding Poults)
6. Troubleshooting Common Problems
| Issue | Possible Cause | Solution |
|---|---|---|
| Low hatch rate | Temp or humidity fluctuations | Stabilize environment, check equipment |
| Sticky poults | Low humidity during hatch | Raise humidity to 65 % |
| Leg deformities | Slippery floor or deficiency | Use grip bedding, add niacin supplement |
| Dead in shell | Lack of oxygen / excess heat | Increase ventilation, recalibrate thermometer |
7. Raising Poults After Hatch
Provide constant access to feed and water. Use shallow dishes to prevent drowning. Monitor activity—healthy poults should be alert and curious.
By week 6–8, transition to grower feed (20 % protein) and introduce limited outdoor time on warm days.
8. Why Buy Turkey Hatching Eggs and Poults from AV Birds
At AVBirds.com, we take pride in offering premium, fertile eggs from heritage breeds like Bourbon Red and Royal Palm. Our carefully selected breeding stock ensures strong fertility, genetic vigor, and beautiful plumage. We ship with temperature-controlled packaging and offer guidance for new breeders.
(Internal links: “Shop Turkey Poults” / “Fertile Hatching Eggs”)
Conclusion
Hatching turkey eggs is as much art as science. With proper equipment, consistency, and patience, you can achieve strong hatch rates and healthy poults. When you’re ready to start your next batch, visit AVBirds.com for top-quality Bourbon Red and heritage turkey eggs delivered to your door.